
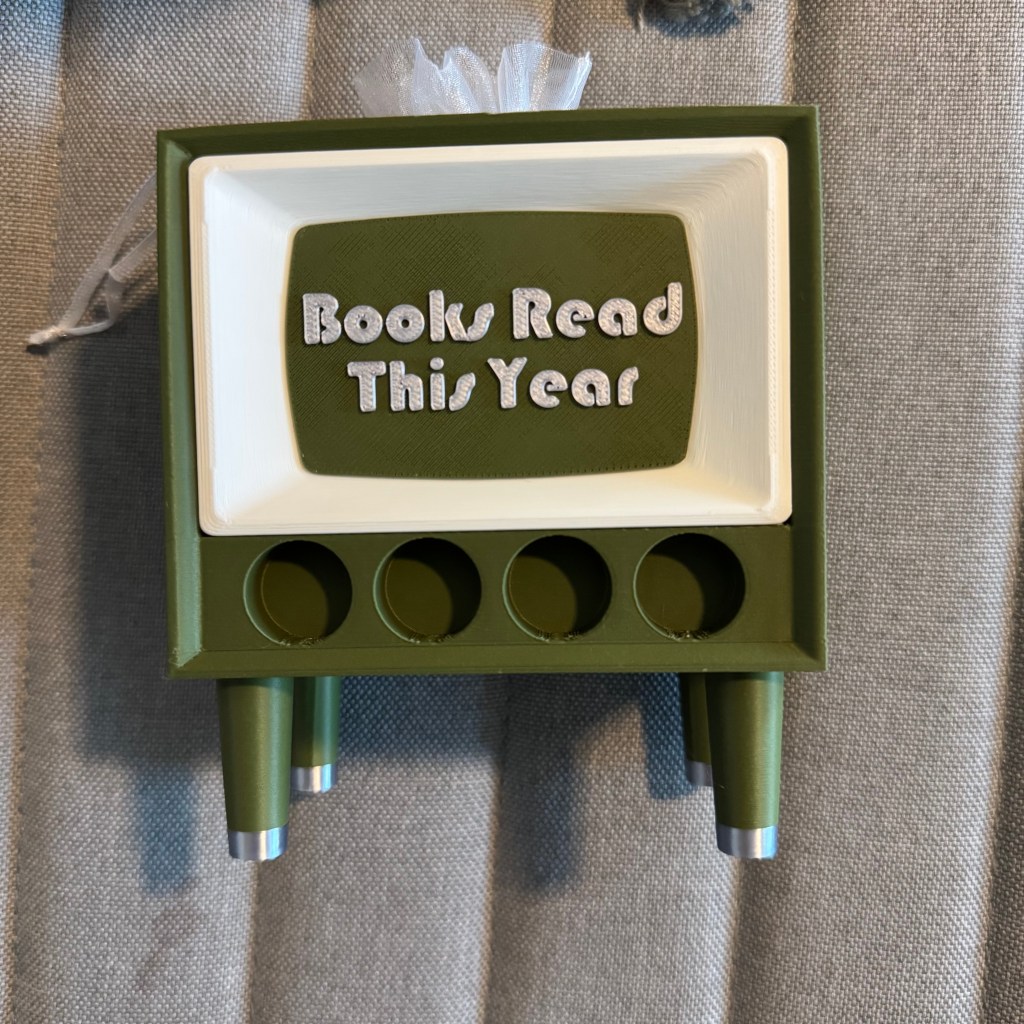
One of the things I love the most is reading! I love reading, and I love books, so it’s only natural that a lot of my products are centered around reading and library decor. As I was doing some research into how to expand my product categories, I stumbled across these ‘Books Read This Year’ counters. I’d always tracked reading via apps, but to have a physical way to count and track reading, which also looked good on a bookshelf, was a great idea, so I set about designing one.
The trackers I saw online all looked very similar. The same format, same design, with minute variations. While there might have been some benefits to just going the way everyone else was, I’m not one to copy, and no matter what category I’m designing for, I want my work to stand out. Because of this, it took quite a while to settle on a design.
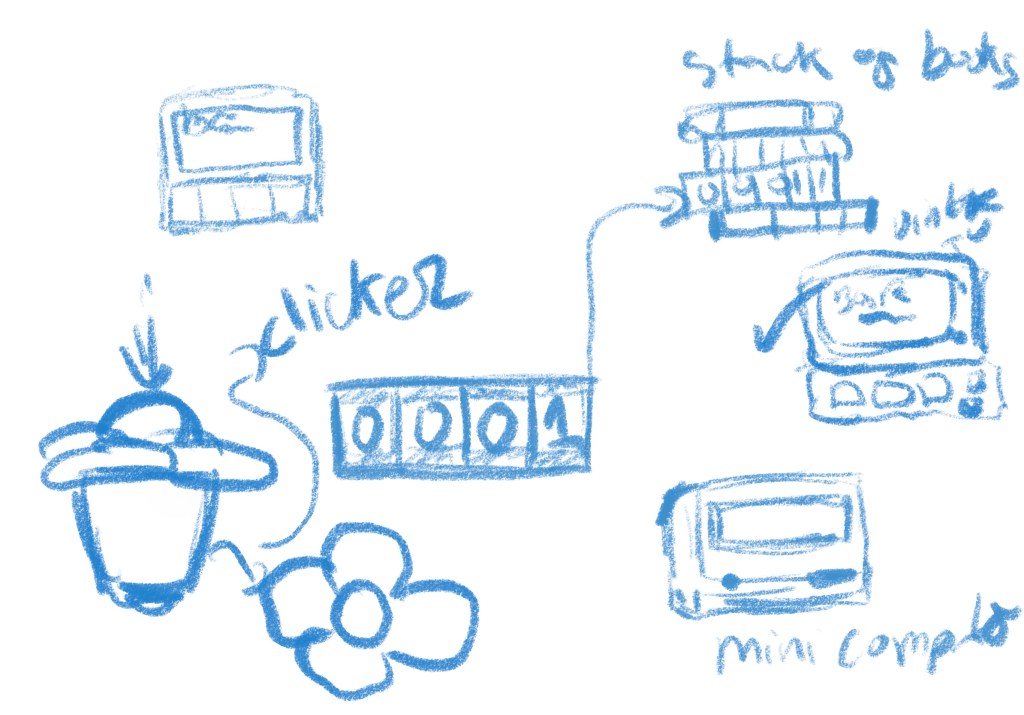
At first, I was really hung up on having some kind of clicker format, then I wanted a mechanical counter. Aside from the counting method, I was also stuck on the form. Something book-themed felt appropriate, but a stack of books was majorly overdone. Then I really got interested in retro and vintage computer designs. They were good, but I couldn’t find a way to place the actual counter in a way that made sense to me. But sticking with that retro theme, I landed on the perfect design.
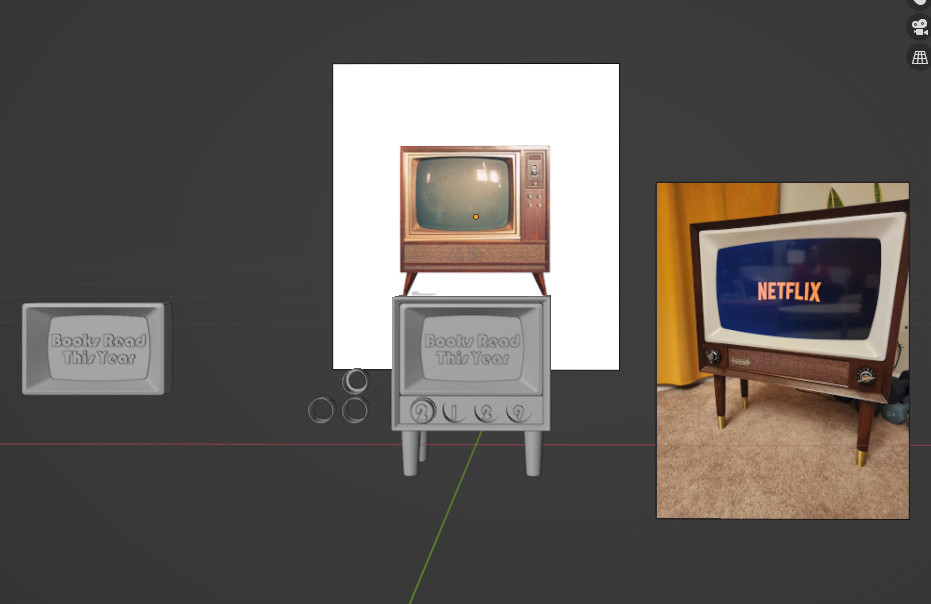
These TVs were perfect. The shape and look of them were so cute and distinct, and they lent themselves well to color customization. Having the counters as knobs also felt very intuitive, and then I was able to open up the back to have storage for the knobs and bookmarks, which expanded the functionality.
Modeling it wasn’t too difficult; there were a few parts to assemble and glue, but overall it was an efficient design that looked good and wouldn’t take much time after each part was printed to put together. As I’ve made more, I’ve consolidated some parts. For example, I initially made the legs separately and glued them, but over time, that was too time-consuming, and the gluing process was messy, so I decided to make them as one piece. A similar consolidation happened with the screen. It boiled down to printing time vs. assembling time, and ultimately, having a slightly longer printing time was more efficient.
Honestly the biggest hassle ended up being these rings… oh my goodness.. these rings!!
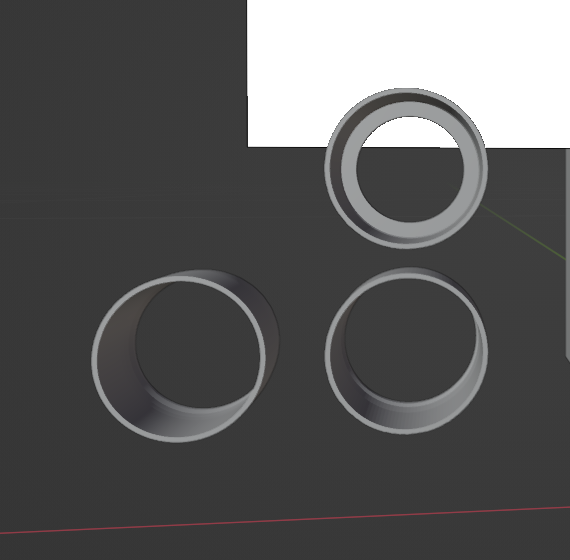
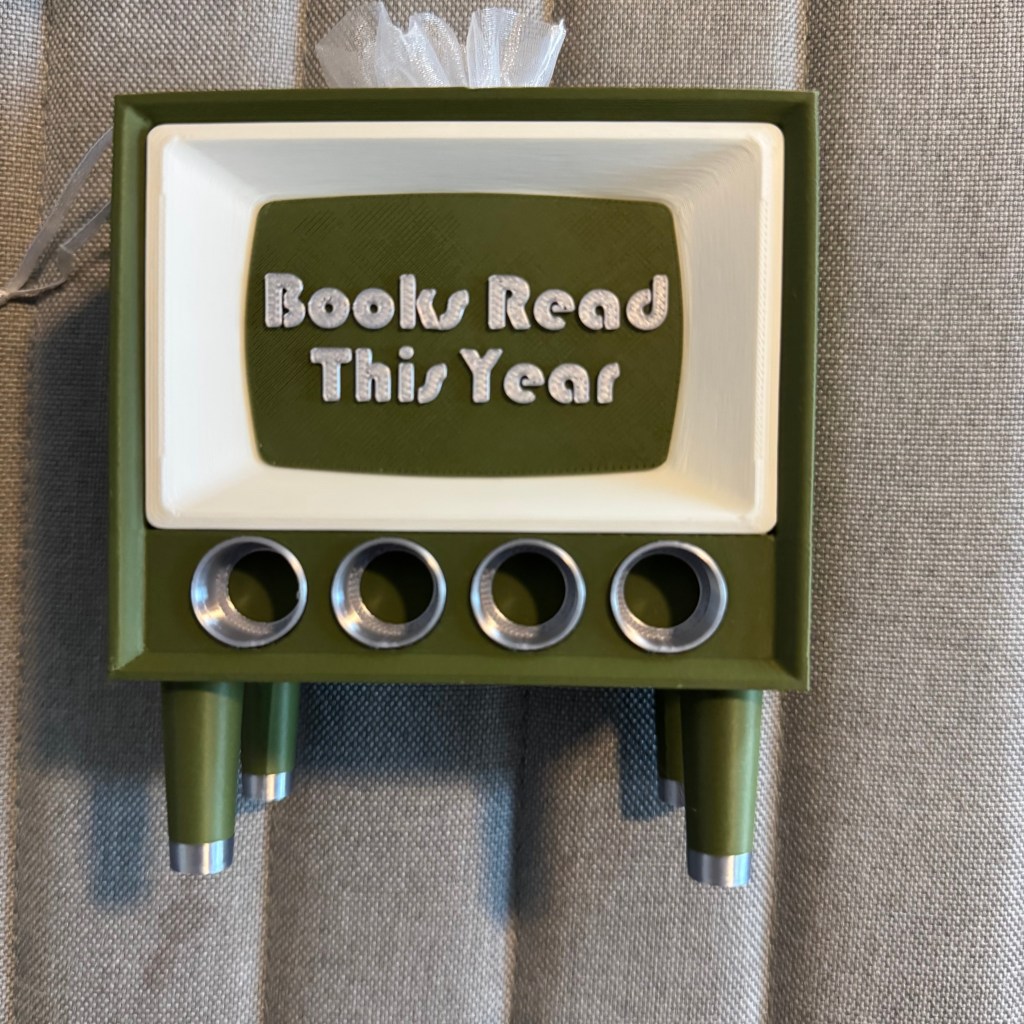

The rings are barely noticeable, but it was a detail that I just couldn’t let go of. I think it ties the whole design together, so I really had to make it work. So, what was the issue? Let’s start at placing them into the holes. Between the number knobs and these casing rings, there is not a lot of leeway for making sure everything fits, and that the knobs can be placed and removed easily. Because of this, I had to make the rings as thin as possible.
The first version was perfect, except for the fact that it was so difficult to push into the holes. Seriously, I almost sprained my wrist trying to force it in, which led to pain on my part and many broken rings. I decided to make them thinner. This way, they would slide into place more easily. The problem there was that they were so thin that the slicing software1 couldn’t recognize the bottom layers, so it couldn’t print.
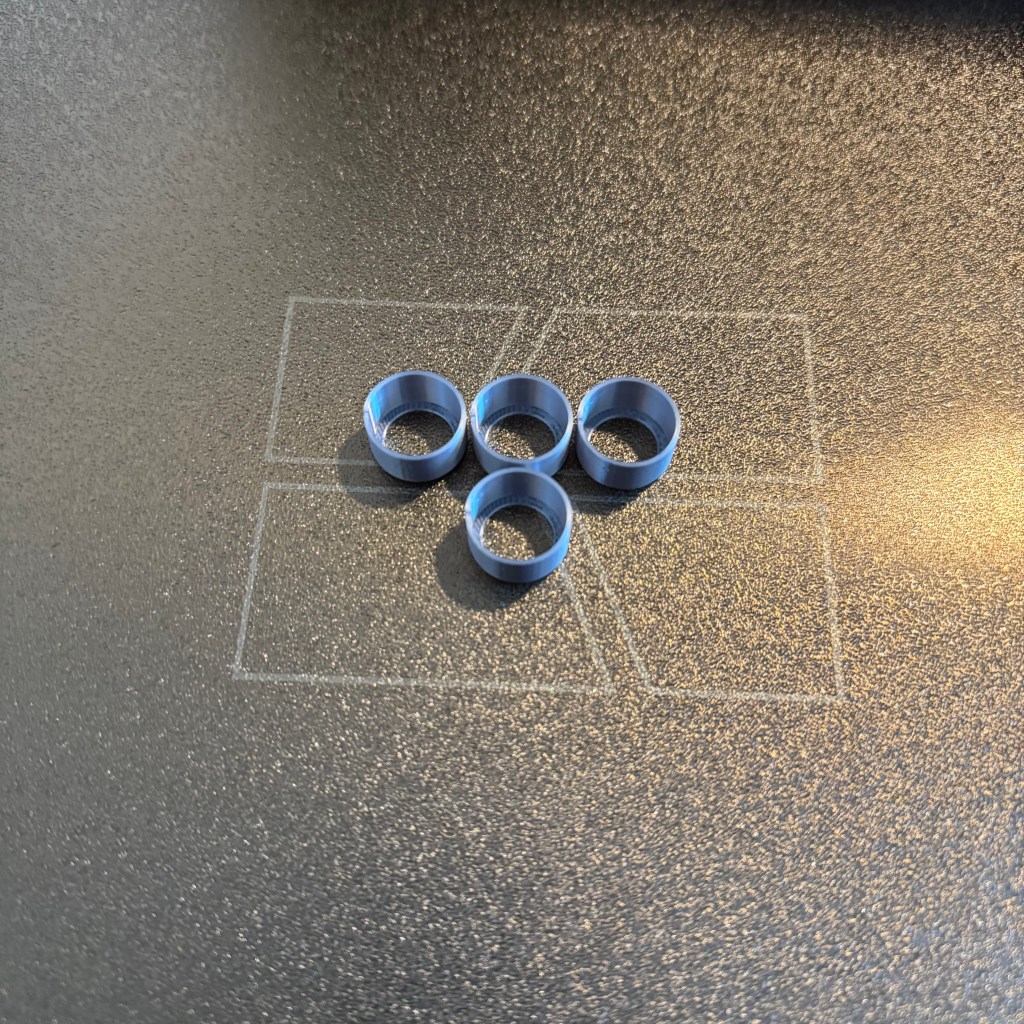
Ok fine! lets make it taper a bit. Overall, it would be thinner, but the bottom layer would have a thicker internal ring width. Problem solved! Except no, it wasn’t solved. The part printed, and it slid into place easily, but that slight taper made placing the knobs kind of awkward. Instead of a smooth slide into place, it would kind of get stuck. It was good enough, but it kept bothering me. Then finally it hit me, and I’m not sure why it took so long. But the solution was to give a base to the rings. This way, they could be as thin as I neded them to be, but the base would anchor the first layer for printing.

Voila! it was finally perfected. And so I present to you the ‘Books Read This Year’ Counter

- Slicing Software: With 3D printing, there is software that takes the 3D model and essentially slices it into layer-by-layer instructions for how the model gets printed. I use Bambu Studio. ↩︎

Leave a comment